Agility Academy: take courses and earn certifications. Learn at your own pace - it's free! Learn More
Locales
What are Locales?
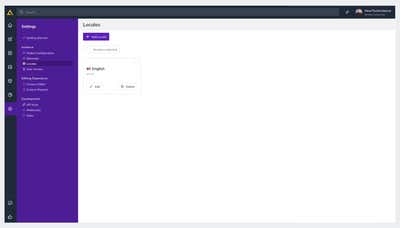
It should be easy and painless for you to reach people around the world with your content, which is why we offer unlimited Locales for free, right out of the box. Maybe you want a blog post in both English and French or a Landing Page in both Dutch and German. We can do that.
It’s now easier than ever to initialize and create layouts and content based on the Locales you’ve setup in your Agility Instance.
Add a New Locale
To get started:
1. Navigate to the Settings section of your Agility Instance
2. Click Locales

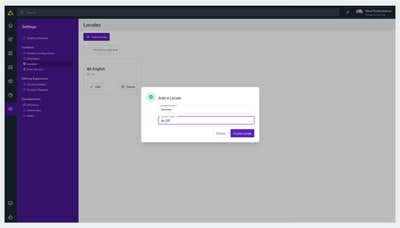
3. Click Add Locale
4. Type in a Name for the Locale as well the Locale Code for the Locale you’re adding (Most use a standardized code that can be found here)

5. Click Create Locale
Switching Between Locales
If your Instance has multiple locales set up, you can easily toggle them from the Pages and Content sections of Agility.
1. Locate and click the drop-down in the top left-hand corner of the page
2. Choose the Locale you’d like to switch to

Looking to Translate content from one Locale to another? Check out the Google Translate App in the Agility Marketplace.
Deleting a Locale
Once you’ve saved your language details, you can't change the code as it may cause problems on your website. If you're looking to delete your locale or need to have a language code changed, please contact us through the chat in your Instance or by emailing support@agility.com