Agility Academy: take courses and earn certifications. Learn at your own pace - it's free! Learn More
Managing Pages
What are Pages?
Pages are exactly what they sound like, the area in Agility where you’ll build out the pages you want to display to visitors. Once you have a Page it can be used to build front-end content such as the pages of a website or other online solution.
In this resource we’ll break down how to create one as well as the various page sections and how you can use them.
Create a New Page
1. Click Pages
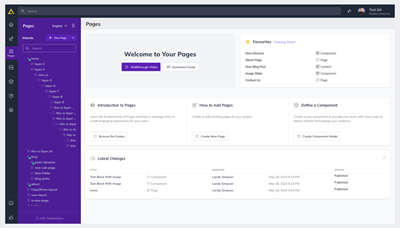
2. Click + New Page
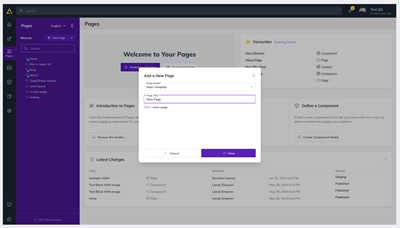
3. Choose your Page Model
4. Add a Page Title and Click Save
Content Zone
This is where you’ll define the architecture of the page by adding, editing and rearranging Components
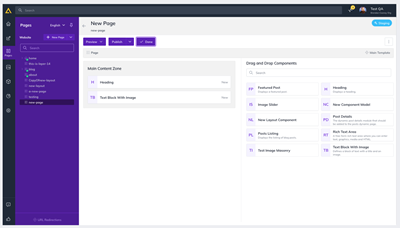
You can find and explore the Components available to you by clicking +Component in the top-right of your Content Zone. You can then drag and drop to add, remove and arrange them as needed. Component placement in the Content Zone determines where the content will appear on the page of your site or digital solution.
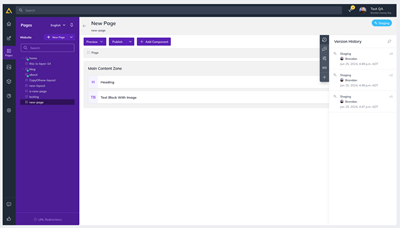
Version History and Commenting
Agility offers powerful and robust tools that give Editors a running list of changes that have been made to a piece of content over time, information on what modifications were made, who made them and when, the ability to revert to those earlier versions at any time, and the option to add comments to document and share important information about the content or changes that have been made with your team.
Properties
Within the Properties section you can manage the Page Type, Page Model, enable Approvals and more.
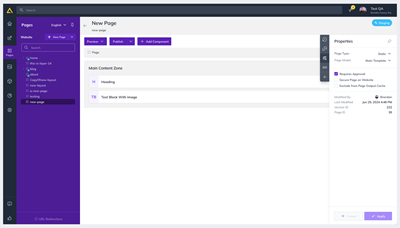
Page Type - Allows you to switch between a [Static and Dynamic Page: Link back to Intro to Sitemaps]
Page Model – Switch between a list of available page templates
Approvals – Allows you to enable the Approvals Workflow for this Page
SecurePageon Website
Exclude Page from Output Cache
SEO
This is where you can add meta data and scripts to your page which can be either connected to a specific module or the full page.
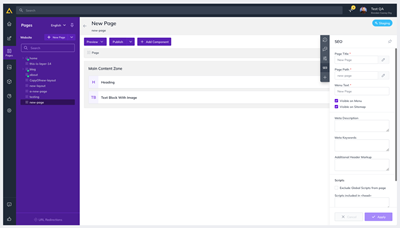
Search Engine Optimization is essential to make sure that you will obtain a lot of relevant traffic on your pages. Click the link below to learn how to better manage your SEO in Agility.
Scripts
This is where you would run any Javascript that needs to be run on this page. Typically, you would use this to enter any page-specific analytics scripts such as a tracking pixel of a custom Google Analytics event.
From this section, you can also optionally exclude this page from your Global Scripts which normally contains a global analytics script across the site. This can be useful for excluding a page from your google analytics.
Add App
This will pop-open our App Marketplace where you can add any Agility or Private Apps that have been installed in your agility Instance.
Scheduling
Agility offers powerful publication scheduling that allows you to plan your content in advance and decide a specific Release Date (when your content should automatically be published) or an Expiry Date (when your content should automatically be unpublished)
Security
The Security setting allows you to grant your users additional, special permissions for individual pages or content lists. For instance, if you have a user with global Reader-level permissions, but you want to give them access to edit a specific page. This is when you would utilize the Security setting to grant additional access to that page.
Another example could involve a site editor whom you wish to grant Approval permissions for a specific page or content list.
The purpose of the Security setting is to offer special permissions that go above and beyond the users' existing Global Permissions. You cannot assign lower-level permissions than what the user has globally as the system will always check for the highest level of permission.
Alerts
Alerts give you the option to create a list of users who will be notified when a specific action occurs on the page. This is found by clicking the menu indicator icon next to the page name, and then clicking Alerts.
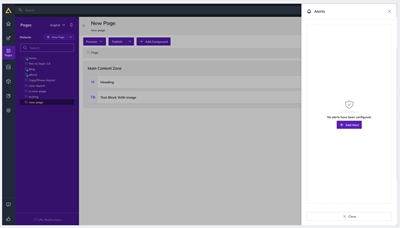
- New – New content has been added
- Update – An update has been made
- Approve – A change has been approved
- Request Approval – Someone has requested Approval
- Decline – A Change has been declined
- Publish – An update has been published
How to Publish a Page
Once your page is ready to go
1. Click Publish
2. Confirm you’d like to Publish by clicking Publish again in the pop-up
Further Reading