Agility Academy: take courses and earn certifications. Learn at your own pace - it's free! Learn More
Salesforce Sales Cloud
Salesforce Sales Cloud is a full service CRM platform that allows you to grow your accounts, find new customers, and close deals - faster. Dig deep into detailed reports, monitors the health of your business, and stay up-to-speed on your teams pipeline all from within the real-time dashboard, giving you a picture of your business at a glance.
Integrate Salesforce Sales Cloud on your Agility CMS powered website to seamlessly start capturing form submissions for contact and lead generation.
Setting up Salesforce Sales Cloud
Step 1: Sign up to Salesforce
To get started with Salesforce, sign up for a Free Trial using the Developer Edition.

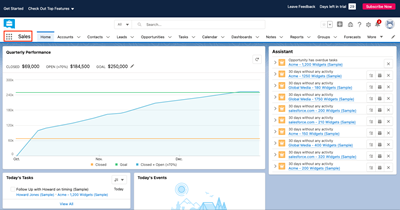
Once you sign up for a free trial and login, you will notice some sample data Salesforce provides. Make sure your on the Sales app by selecting it in the top left-hand corner.

Step 2: Get Salesforce Security Token
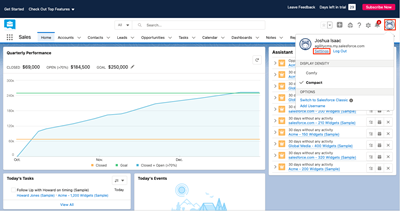
Next we need to get a Salesforce Security Token so we can start using their API's. Click on your Profile at the top right-hand corner, then click on Settings.

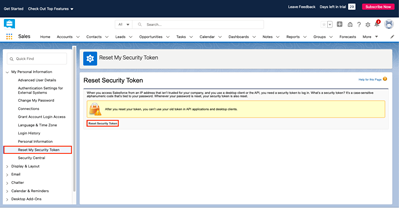
Click on Reset Security Token in the sidebar located on the left-hand side, and reset your token.

Once you reset your token, you will receive an email containing your new token. Save this, as we will need to user it later in the tutorial.
Setting up an Agility CMS Website
If you haven't already, you'll also need to sign up for a Free Agility CMS Account. Once you have an account, you'll be able to select a starter and create an Instance.
Adding Salesforce to Website
There are a few ways you can integrate Salesforce with your Agility CMS powered website.
REST API
The Salesforce REST API provides you with programmatic access to your data. The flexibility and scalability of REST API make it an excellent choice for integrating Salesforce into your applications and for performing complex operations on a large scale.
Salesforce REST API Documentation
JSForce NPM Library
The JSforce NPM Library (f.k.a. Node-Salesforce) is an isomorphic JavaScript Library utilizing Salesforce's API: It works both in the browser and with Node.js.
For the purpose of this tutorial, we will be using the JSForce NPM Library.
Step 1: Install Dependencies
To add JSForce, run the following command in your project directory:
yarn add jsforce

// or

npm install jsforce
Step 2: Set up Environment Variables
Next you'll want to set up some environment variables:
// Salesforce login URL
SF_LOGIN_URL=https://login.salesforce.com

// Sales username
SF_USERNAME=

// Salesforce password
SF_PASSWORD=

// Salesforce Security Token
SF_TOKEN=
Step 3: Create Backend Service
The JSForce Library can work both in the browser and with Node.js. For this example, we will be using a Node.js as a backend to create new Contacts in our Salesforce dashboard.
The code below will create a connection to Salesforce and create a new Contact based on the parameters we pass in as the requests body:
const jsforce = require("jsforce");

const { SF_LOGIN_URL, SF_USERNAME, SF_PASSWORD, SF_TOKEN } = process.env;

export default async function handler(req, res) {

  // get form submission
  const data = JSON.parse(req.body);

  // store connection
  const conn = new jsforce.Connection({
    loginUrl: SF_LOGIN_URL,
  });

  // login to salesforce
  conn.login(SF_USERNAME, SF_PASSWORD + SF_TOKEN, (err, userInfo) => {

    // error logging in
    if (err) {
      console.log("Error: ", err);
    } else {

      // create new contact
      conn.sobject("Contact").create(
        {
          FirstName: data.FirstName,
          LastName: data.LastName,
          Email: data.Email,
          Phone: data.Phone,
        },
        (err, res) => {

          // error creating contact
          if (err) {
            console.log("Error creating contact", err);
          }

          // contact created
          console.log("Contact Created: ", res);
        }
      );
    }
  });

  res.status(200).json();
}
Step 4: Add Form
Now that we've created our backend, we can create an HTML form that submits the fields to our Backend API Endpoint, which will store the data into our Salesforce dashboard.
  <form
        method="POST"
        onSubmit={(e) => {
          // prevent default
          e.preventDefault();

          // store form data
          const formData = {};

          Array.from(e.currentTarget.elements).forEach((field) => {
            if (!field.name) return;

            formData[field.name] = field.value;
          });

          // hit our backend
          fetch("/api/salesforce/salesforce", {
            method: "post",
            body: JSON.stringify(formData),
          });
        }}
      >
        <label>
          First Name
          <input type="text" placeholder="First Name" name="FirstName" />
        </label>
        <label>
          Last Name
          <input type="text" placeholder="Last Name" name="LastName" />
        </label>
        <label>
          Email
          <input type="email" placeholder="Email" name="Email" />
        </label>
        <label>
          Phone
          <input type="number" placeholder="Phone" name="Phone" />
        </label>
        <button type="submit">Submit</button>
      </form>
Step 5: Test the Form
Once you've created your backend and your frontend form, you're ready to test it out. If all is successful, the after completing a form submission, you should have a new Contact record in the Contacts list of your Salesforce dashboard.
