Agility Academy: take courses and earn certifications. Learn at your own pace - it's free! Learn More
Fields
What are Fields and why are they important?
Agility is equipped with many useful Field Types that can be used to help you successfully model your Content Models and Components
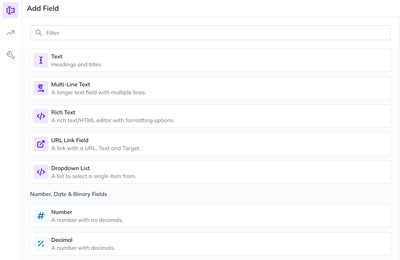
Field Types
Text Field
A Text Field allows editors to enter a single line of editable text, often used for titles, labels or placeholders.
- Maximum Length: Set an optional maximum character length for the field. Text fields cannot be set higher than 128 characters. Additionally the 128 limit is tied to the field API name "title", so any field using title will be subject to this limit.
- Default Value: Set an optional default value for the field.
Multi-Line Text Field
A Multi-Line Text Field allows editors to enter multiple lines of editable text.
- Maximum Length: Set an optional maximum character length for the field.
- Default Value: Set an optional default value for the field.
HTML Field
The HTML Field is a Rich Text Content Editor used to quickly and easily add and control the appearance of HTML content on a webpage without having to write HTML code.
- Maximum Length: Set an optional maximum character length for the field.
- Default Value: Set an optional default value for the field.
Drop-down List
The Drop-down List field allows editors to select one of many options in a drop-down list.
- Drop-down List Choices: Define the list of choices that will be available to editors in the drop-down list.
URL Field
The URL Field allows editors to define a URL thats links to an internal page, external page or to a file.
- Default URL: Set an optional default URL for the field. .
- Open Link in New Window: Select whether you would like this link to open in a new window.
Number
The Number Field allows editors to enter a number.
- Default Value: Set an optional default value for the field.
Decimal
The Decimal Field allows editors to enter a number in decimal format.
- Default Value: Set an optional default value for the field.
Date/Time
The Date/Time Field allows editors to select a date and time.
- Include Time: Allow for time to be selected in addition to the date.
- Default to Current Date: Default the Date Selector to the current Date / Time.
- Default Value: Set an optional default value for the field.
True/False
The True/False Field allows editors to select between a True or False value.
Default Value: Set the default Boolean value to true of false.
Linked Content
Linked Content fields allow you to reference another content list. This field can be useful for creating relationships between content items or nesting lists within an item.
The Linked Content field lets you link content from a new or an existing content list.
Example: Linking to a list of recently published blog posts.
- Link To: Select whether this will be linked to existing Shared Content, or if it should create new content, which is unique and only accessible to this item.
- Link Type: Select whether this will link to a whole list/item from Shared Content or editors will select one or many items only from a list.
- Render UI: Select how you want to render the user interface for the linked content field for editors.
- Shared Content Selection: Force to a specific Shared Content List or allow the user to select their own list.
- Shared Content List: The user may select the content they want to reference.
Hidden Fields
Hidden Fields can be created to store values used by a content model or component model and will not be visible on your site.
Hidden fields will also be automatically created when choosing "Create a new Field" for the "Save Text to Field" or "Save Value to Field" options in your Field Properties so any pages or content using that Model/Component will know where to find that stored information.
Important Note
Hidden fields created for Save Text/Value to Field are imperative to storing field values for your content models and components and should not be deleted from the model or disabled from the Field Properties tab.
Custom Fields
Custom fields allow you to render a custom UI for a field that an Editor interacts within Agility.
Example: Color Picker Field
- Custom Fields Type: Set the Custom Field Type for this field.
Custom Section Fields
The Custom Section Field is a field that can contain custom HTML content and is only visible within the CMS.
- Custom Section Content: Set the content for this Custom Section.
Image
The Image Field allows editors to select an image.
- Require Alt Text: Require editors to set Alt text for screen readers.
- File Size: Set file size restrictions for editors to follow.
- Image Width: Set width parameters for this image.
- Image Height: Set height parameters for this image.
- Default Upload Folder: Set a default folder where files will be uploaded.
Gallery
The Gallery Field allows editors to select multiple images.
- Gallery Type: Choose to create a new gallery, select a current gallery or leave it up to the editor to choose.
- Default Folder Name: Set a default folder name for this new gallery.
File
The File field allows Editors to select a file.
- File Size: Set file size restrictions for editors to follow.
- Require Alt Text: Require editors to set Alt text for screen readers.
- Default Upload Folder: Set a default folder where files will be uploaded.
List of Files
The List of Files field allows editors to select multiple files.
- Default Upload Folder: Set a default folder where files will be uploaded.
Field Limits
We provide advanced options for some of our fields such as Limits and Validations, first we'll look at Limits.
Often users are required to set limits to fields of text. Character limits can come from brand and style requirements to maintain brand compliance. Or to support rendering content on mobile devices with smaller screens.
By setting character limits the user is automatically blocked from entering characters when the text reaches the maximum character allowed. This removes human error and saves a lot of time and resources reviewing and fixing content.
Agility provides a quick and easy way to set character limits on Fields for both Content Models and Components.
Set up Limits
1. Navigate to your Models area, then select Components or Content Models. For this example we'll be using a Component.
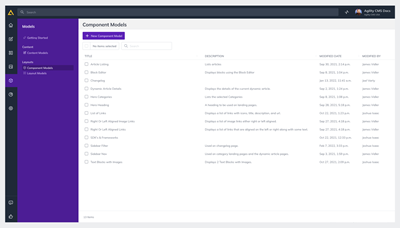
2. Select a Component and add a Text Field or edit and existing one and then click Advanced
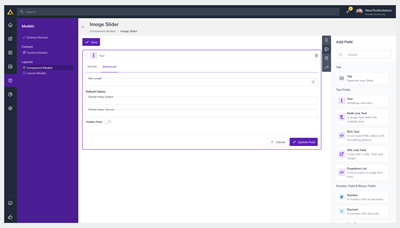
3. Set a Maximum Length and then click Update Field
Note
The current maximum length of a text field is 128 characters.
Field Validations
Images and Files are an important piece of content but special care should be taken to ensure they're optimized for the web. Images that are not sized correctly will affect page performance and create potential page issues.
Agility provides a simple way to validate Image and File Fields for both Content Models and Components. You can restrict by File Size, Height, Width, Valid File Types, and create custom Validation Message to help enforce proper image guidelines.
To set up Validations
1. Navigate to your Models area, then select Components or Content Models. For this example we'll be using a Component again.
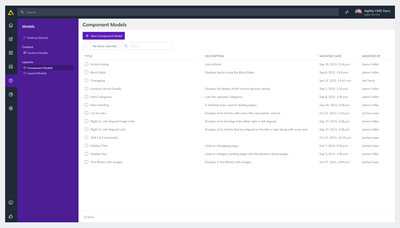
2. Select a Component and add a Image Field or edit and existing one and then click Field Properties
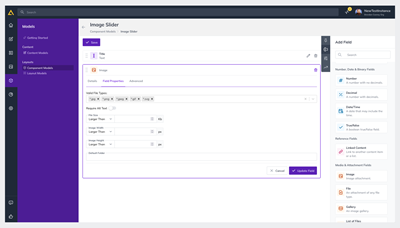
3. Set your Restrictions for File Type, File Size or Image dimensions and click Update Field
Further Reading: