How to start with Headless Commerce: Agility CMS, Next.js & Snipcart Tutorial
Headless Ecommerce 101: How to add a shopping cart to your website using a Headless CMS, Next.js & Snipcart.


Due to the unprecedented events of 2020, the way we buy and sell goods and services has totally changed. If you're looking for a modern, fast-performing, and secure E-commerce solution, stick around!
In this post, I'll walk you through adding an E-commerce layer using Snipcart to an Agility CMS + Next.js starter website in this step-by-step tutorial.
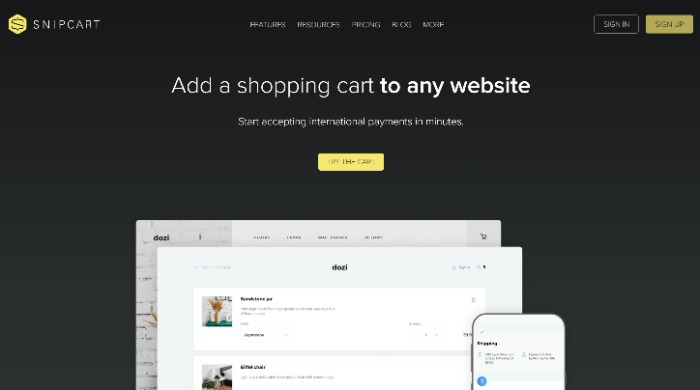
It will end up looking something like this:
This tutorial will cover these steps:
- Getting Started with Agility CMS
- Get the Code
- Authenticate your Next.js & Agility CMS Website
- Getting Started with Snipcart
- Creating Products in Agility CMS
- Displaying Products on our Website
- Fetch products from your Website into Snipcart
- Wrapping it up
If you want to do your homework and watch this workshop with Snipcart founder Charles, JAMstack eCommerce guru Flor from JAMstackSeattle and our James Vidler, expert of all things related to your EX (Editor Experience that is) then please hop in here:
This tutorial will help create a base to kick-start the amazing ecommerce project you can do super quick with Agility CMS, Next.js & Snipcart and we will deploy to Vercel of course! Let's do it.

What is Agility CMS?
With all the features of a headless CMS and the familiar authoring tools that marketers love, Agility CMS is known for offering "the best of both worlds".
- With Agility, you can deliver content to any front end using any coding language via RESTful APIs, our opensource SDKs, and JAMstack technologies.
- This cloud-native, API-first platform is hosted on Microsoft Azure, so we can scale instantly at a moment's notice. On your side, you can host your solution anywhere you like. Host solutions on your terms and provide industry-leading security and page load speeds. Your customers will always get the best experience no matter what.
- With built-in page management features, you can create, manage and organize pages using reusable blocks and sitemaps – all without having to rely on a developer.
What is Next.js?
Inspired by PHP, Next.js benefits from JavaScript modules, enabling developers to export the components of an app and allowing them to perform individual tests for each element as well as thousands of other components and modules from npm.
- Next.js enables developers to create a solution, where, instead of loading all of the JavaScript, the application will only load the bundle needed.
- Prefetching, one of Next.js' features, picks off where code splitting leaves off, allowing optimized bundles of code to be lazily-loaded behind the scenes.
- Next.js enables hot-module replacement, which means that instead of reloading an entire application when code is changed, it only recreates modules that have been altered.
What is Snipcart?
In case you don't know yet, both Snipcart and Agility CMS are amazing Canadian players.
Snipcart is JAMstacker's favorite tool to add a shopping cart to your website and start accepting international payments in minutes. But it is not just that.
- Snipcart is a comprehensive e-commerce platform that has been designed to be easy to incorporate e-commerce into any custom website.
- The beauty of Snipcart is that it works perfectly with Headless CMS which means better security, scalability, speed and functionality for your JAMstack solutions.
- Snipcart is an E-commerce solution that allows you to use a Headless CMS & frameworks you love. Snipcart also offers a full back-office management dashboard where you can track abandoned carts, sales, orders, customers, and more!
Getting Started with Agility CMS
Agility CMS is a headless CMS which combines a set of powerful authoring tools with fast and flexible development environment.
Before you start this tutorial make sure you have a Github & a Vercel account, as they will be needed to deploy your project.
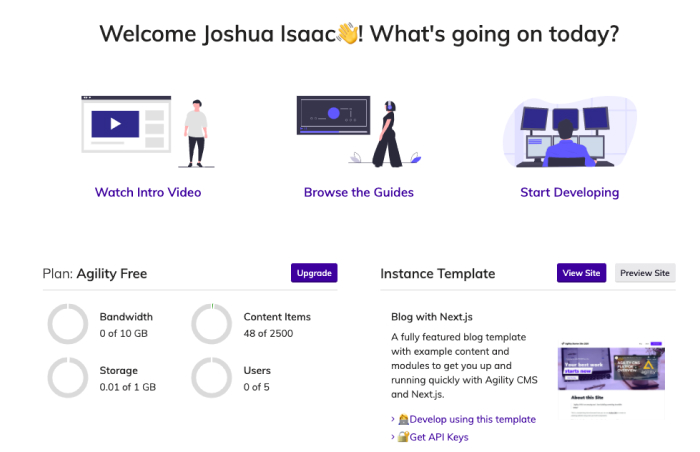
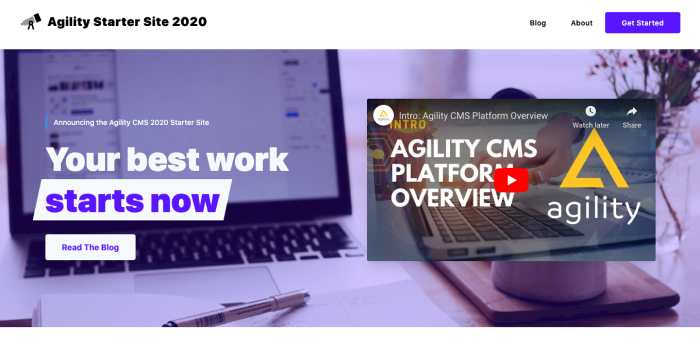
To start, sign up for a Free Agility CMS Account. Set up your profile and select the Blog with Next.js Starter Template. We'll be using this template as a starting point as it showcases features such as Native Page-Management and shows how you should structure your Next.js website. Our Next.js and Agility starter (preview here) serves an example based on our recommended best-practices.
Select Vercel as your Hosting Solution then hit Confirm & Deploy.
Get the Code
When deploying to Vercel, a new Github repository will be created for you. This will ensure you can make changes and updates to your project after deployment. Every push to the Git repository will automatically be deployed.
Clone this new repository to your local machine and open it up in your favorite text editor.
Authenticate your Next.js & Agility CMS Website
- Once you have your code open, rename the .env.local.example file to .env.local.
- Retrieve your GUID, API Keys (Preview & Fetch), and Security Key from your Agility CMS Dashboard by going to Settings > API Keys.
- Place these keys in your .env.local file.
To run the site locally, run npm run dev or yarn run dev in your terminal. If successful, Next.js will compile your pages in real-time and you will be able to access the site in your browser on https://www.localhost:3000
Getting Started with Snipcart
To get started with Snipcart, head over to https://app.snipcart.com/register to sign up for a Free Account.
Once logged you've created an account and have logged, navigate to your Account > API Keys to retrieve the necessary code we need to add to our site in order to start using Snipcart.
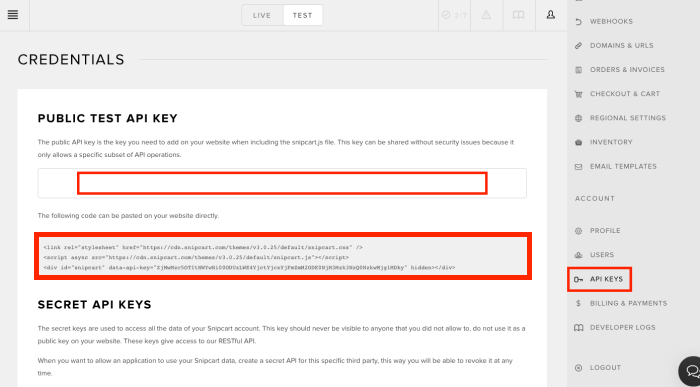
Add the code to the Layout.js file located in the components > agility-global directory of your project. This code will configure Snipcart and enable our shopping cart. You can use this Gist for reference.
Creating Products in Agility CMS
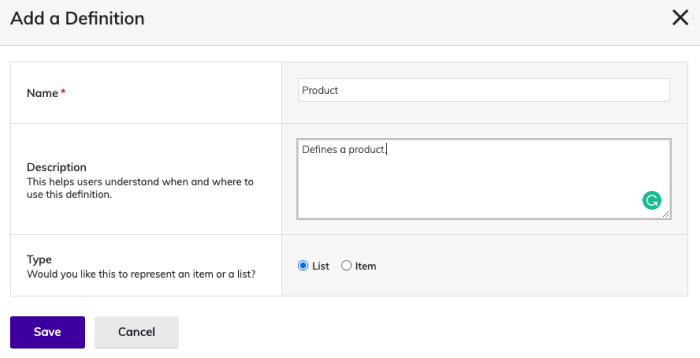
To create products in Agility we must first define what a product should look like. In your Agility dashboard, head to Content Model > Content Definitions. Create a new Content Definition named Product, add a description if you'd like, and make sure the type represents a List.
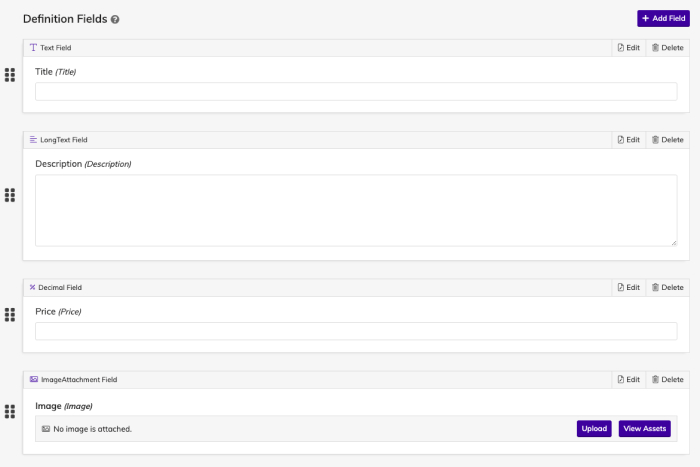
Add fields you would like this definition to use, for simplicity, I will use the following fields:
- Title - Text Field
- Description - Long Text Field
- Price - Decimal Field
- Image - Image Field
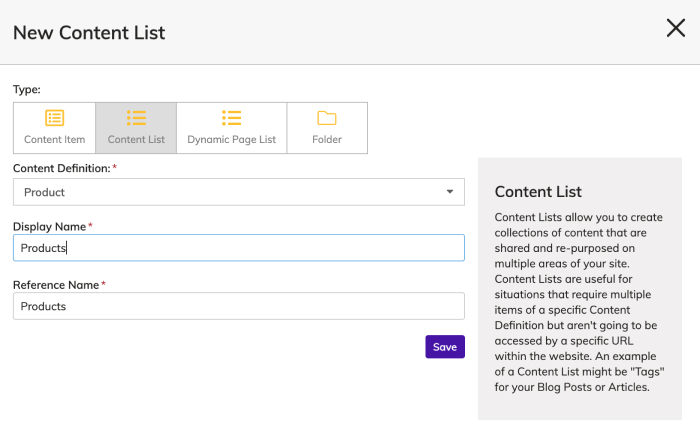
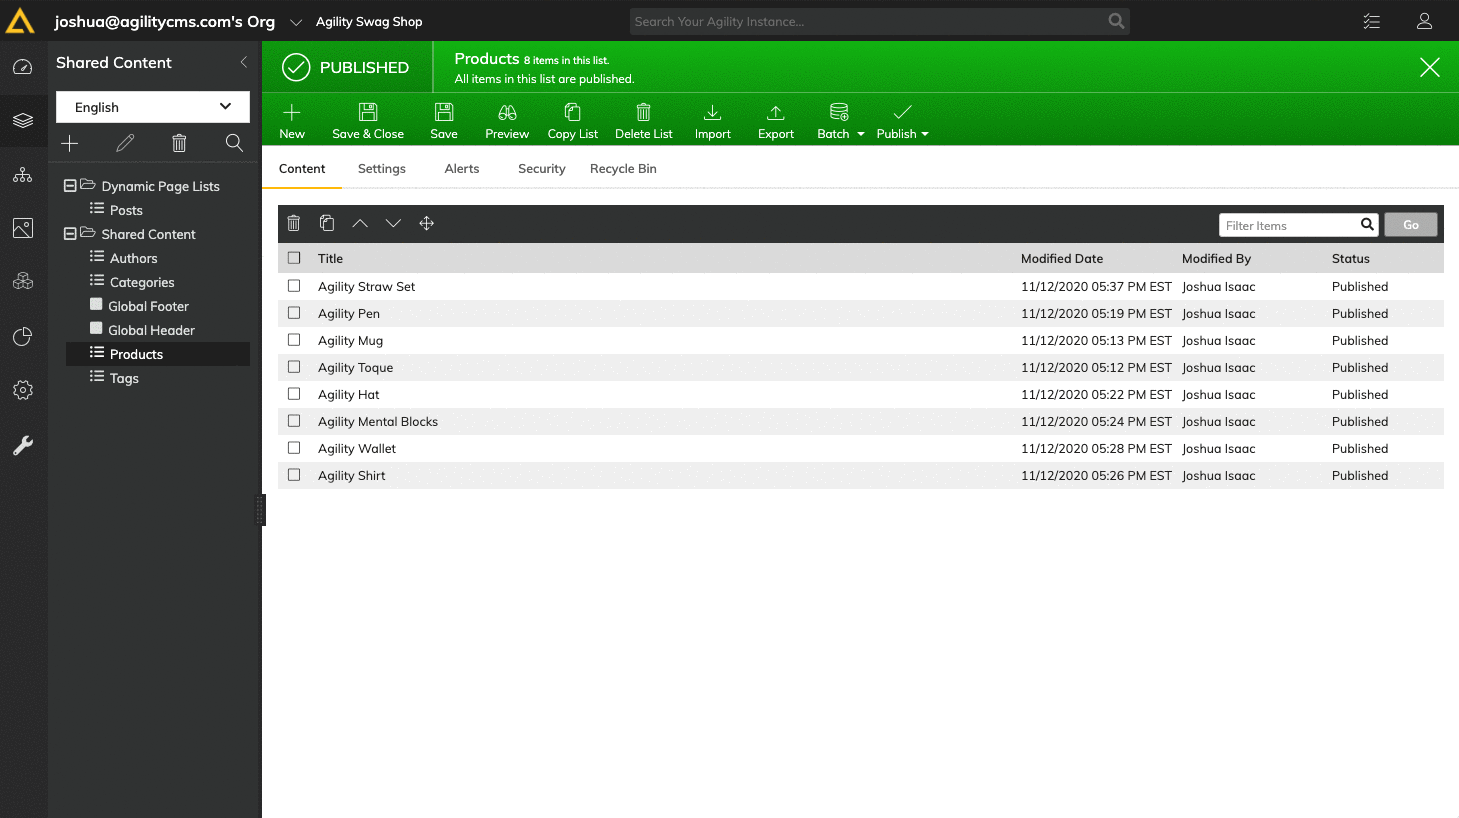
We can now use this Content Definition to start adding products. In your Agility dashboard, Head to Shared Content and add a new Content List using the Product Content Definition we just created.
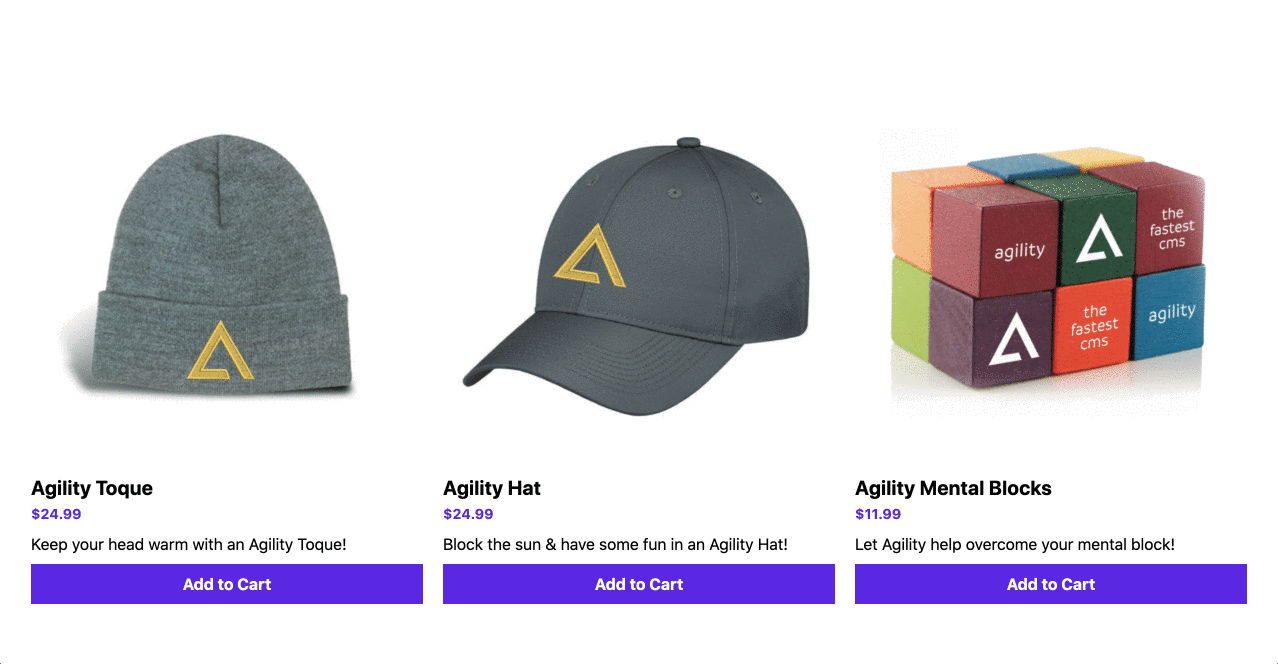
After the Product Content List is created, we can now start adding products to this list, make sure you Publish each product!
Displaying Products on our Website
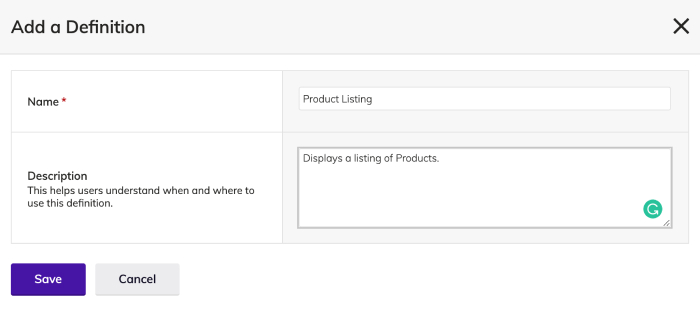
Let's create a Module we can use to display the products we created on our website. In your Agility dashboard, head into Content Model > Module Definitions and add a new Module definition named Product Listing.
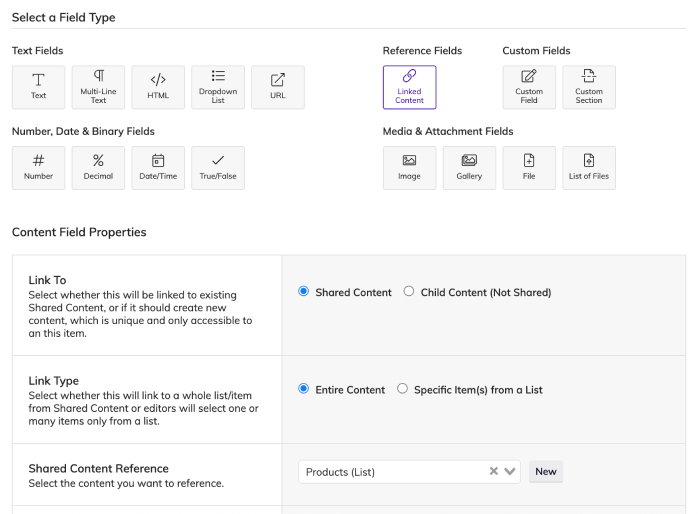
 The field we want to use in this Module is the Linked Content Reference Field. Select Linked Content and configure it with the following properties:
- Link To: Shared Content
- Link Type: Entire Content
- Shared Content Reference: Products (List)
We can now add this Module to our Home page.
In your Agility dashboard, head to Pages > Home and add the Product Listing Module, be sure to Publish the Module & the Home page!
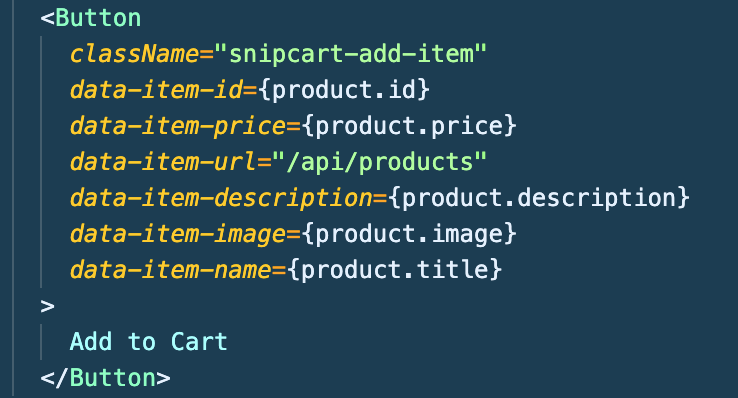
Now we need to create a functional component that corresponds to the Product Listing Module definition we just made. Create a new file in components > agility-modules named ProductListing.js and add the following code from this Gist.
Notice the data attributes on the Add to Cart button. These data attributes are required for Snipcart to be able to add your products to our shopping cart.
Re-run npm run dev and you should see your Products Listing module in action - try adding a product to your shopping cart!
Fetch products from your website into Snipcart
If you tried to complete a checkout you will notice that it fails. This is because Snipcart doesn't know about our products yet. Let's fix that.
We can import products from our website into Snipcart by using Snipcarts JSON Crawler to crawl a unique URL where our products live. Since Next.js has serverless functions built-in, we can fetch our Products Content List and expose it to an API route, and have the JSON Crawler crawl this route.
In your project, create a new file in pages > api named products.js. Copy and paste the code in the following Gist.
We'll need to install the Agility Content Fetch SDK to help fetch our products, run npm install @agility/content-fetch.
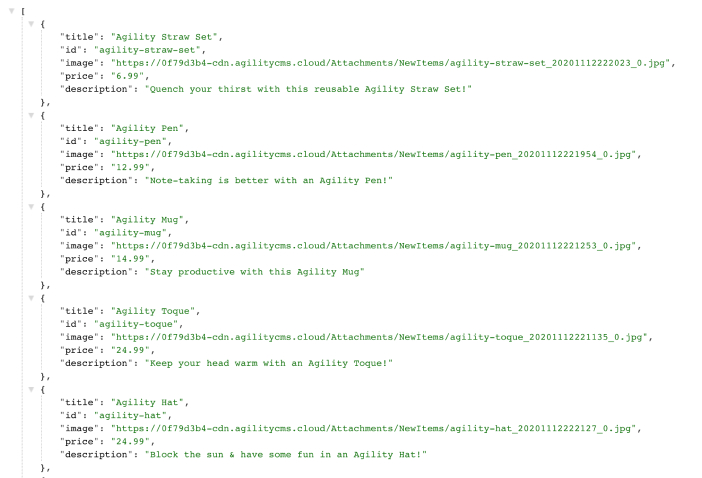
Re-run npm run dev and navigate to http://www.localhost:3000/api/products, you should see a list of your products now in JSON format.
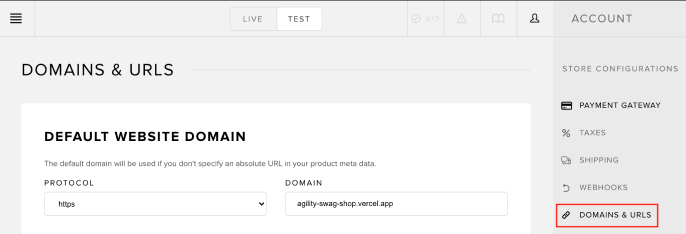
We won't be able to use Snipcarts JSON Crawler on our localhost, so go ahead and commit all these changes and push them to your Github repository so the live website on Vercel gets updated. Retrieve your Vercel Production URL as we'll need to configure this domain on Snipcart.
In your Snipcart dashboard, head into Account > Domains & URLS and paste in your Vercel Production URL then click Save.
In your Snipcart dashboard, head to Products > Fetch and paste in your Vercel Production URL with the /api/products route, then click Fetch From URL.
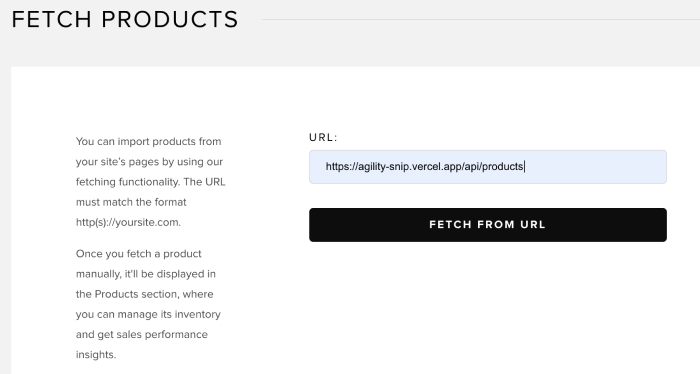
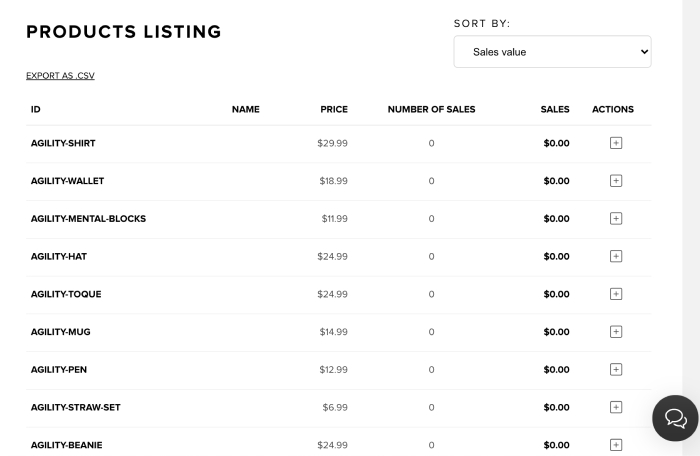
If you head back to your Products page in the Snipcart dashboard you will see that the /api/products endpoint on your website has been crawled and the products are now in your products listing!
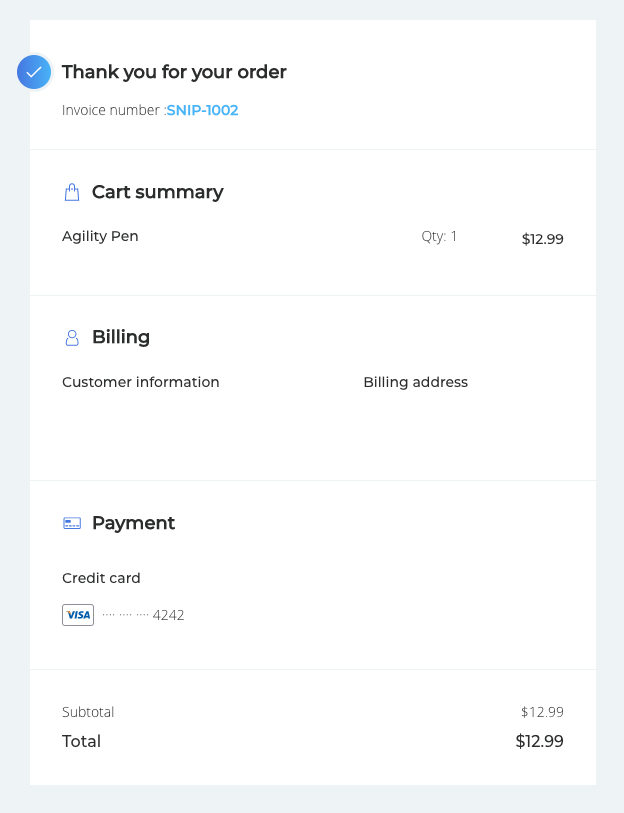
Now that Snipcart knows about the products on your website, you should be able to complete a successful checkout using test credentials!
Wrapping it up
This tutorial was intended to help create a base to kick-start the amazing things you can do with Agility CMS, Next.js & Snipcart! Thank you for sticking with me throughout this tutorial! Hopefully, you are able to take something from this and build your own unique shopping experience!
Getting Started with Agility CMS & Next.js Starter
Good luck and please show off your results on our Slack and tag us @agilitycms and @snipcart if you share your results on social media!
Feel free to follow me (@jamstackjosh) and Agility CMS on Twitter!
Join us on Slack to ask questions and provide feedback directly to the Agility team.
Keep reading:
Launching a JAMstack Website With NEXT.JS + Vercel