Agility Academy: take courses and earn certifications. Learn at your own pace - it's free! Learn More
Using Personalization with Google Optimize, Agility CMS and Next.js
Personalizing content on your website can dramatically help with user engagement and conversions. One of the most effective personalization techniques is known as Geo Targeting, meaning we will show users from different geographic regions content that is specifically tailored to them.
In this article, we'll show you how to use Google Optimize with Agility CMS to achieve this.
The technique we'll be following here is this:
- Define content that allows the editor to specify the location it is targeting.
- Output that content to the website with data attributes so that we can manipulate it later.
- Use Google Optimize to Personalize the page with Geographic Audience Targeting.
Step 1: Define the Content
Setup Content Model
The first thing we need to do is to provide a content structure that includes multiple items and a field for region that's easy for our editors to fill out. In this example, I've created a Content Model called Geo Card. I've added a title as well as a Dropdown field called Region Target with country values for Canada & United States. You can use any region values that Google Optimize can work with, which we'll see in a minute.

Setup Component
Now, we're going to create a Component to allow the editor to add these Geo Cards onto a slider.
Create a new Component that has a field for Title, and a nested Linked Content list based on the Geo Card model.

One of the things you will want to set up on the Linked Content field is to show both the Location and the Title field in the listing, as well as Status. That will make it easy for editors to see which location will be targeted for a piece of content.
On the Cards linked content field, click Field Property Settings, Choose Visible Columns, and select both the Region Target, Title and Status (and any other fields you want to see).

Awesome! Now we just need to add our new Component to a Page and put in some example content.
Setup Page
I've created a Page called geo-target to have a place to set this up, but it can be on any Pageon your site.
I've created items that target both Canada and the United States.

Step 2: Create the Website Code
Now let's set up our website code in a way that will work easily with Google Optimize and continue to be useful in the future.
Create Google Analytics and Optimize Accounts
The first thing we need to do is create properties for Google Analytics and a Google Optimize container. Google has a good step-by-step guide for getting started. Once you have your Analytics Property (make sure this is a universal property, not a V4 property) and your Optimize Container, you can start to set up your code.
On your Google Optimize Container Settings page, under Measurement, link it to your Google Analytics property.
Add Google Analytics Tracking Code
For our example, I'll be using Next.js, but you can adapt this to any frontend web technology. If you're also using Next.js, you can follow our guide on setting up Google Analytics here.
Add the Google Optimize Script
The generic method for adding Google Optimize to your site is to put this script in the <head> tag, replacing the OPTIMIZE_CONTAINER_ID with your container id.
<script src="https://www.googleoptimize.com/optimize.js?id=OPTIMIZE_CONTAINER_ID"></script>If you're using Next.js (or another React-based front-end, like Gatsby) you may have to load this differently.
Here's how I loaded it:
const initOptimize = (callback) => {
 const script = document.createElement('script');
 script.src = `https://www.googleoptimize.com/optimize.js?id=${OPT_CONTAINER_ID}`
 script.id = 'google-optimize';
 script.onload = callback
 document.body.appendChild(script);
}
Simply call this method only once per page and you should be good to go.
The other thing we want to set up if you're using React is an event to tell Google Optimize that we're ready to start manipulating the page.
Simply add this line of code to the same place that you're triggering your Google Analytics page views.
window.dataLayer.push({ event: "optimize.activate" });Create the Component Code with Data Attributes
Let's go ahead and output all the Geo Cards in our Component. I've built this example on top of the Agility CMS Next.js Blog Starter project.
Here are the steps I took - they may vary based on the framework you're building on.
- Add a new component based on the reference name from Agility, In this case, I called it "3ColumnPanel".
- Create separate <div> elements for each Geo Card in the linked content list.
- Add a data attribute to the div elements to indicate which region it's for.
Here's a link to the code for my 3ColumnPanel.js Component.
It basically expands out the linked content and passes it into another component that actually does the page, called ThreeColSlider.js. Here's a link to that file.
Notice the data attributes here - data-elem-type="region" and data-region-target="[Your Region]". We will need to use these later.
Note that the <Card> element is specific to the Next.js blog starter. You can also use a <div> tag.
Once you have all that running locally, go ahead and push your deployment out to a staging server or a preview environment.
Step 3: Set up Google Optimize
Now for the part you've been waiting for! We will be creating a Personalization in Google Optimize for each of the regions we want to target.
From your Optimize account, click on Create Experience, add a Name, the URL of your page, choose Personalization as the type of experience.
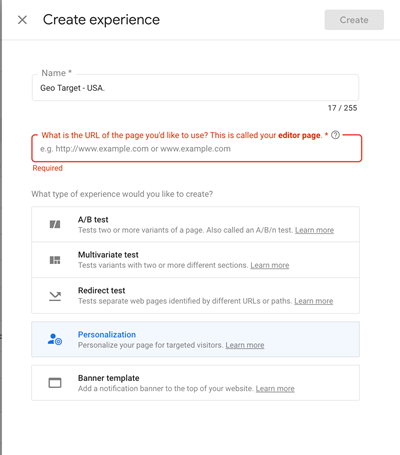
Targeting Rules
Once you're inside the Personalization, click on "start by adding audience target rules".
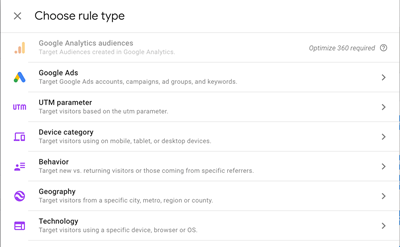
From the selection dialogue, you can see lots of different targeting options that can affect our personalization. For this example, choose Geography, allowing us to target users from a particular country.
In the Geography screen, set the Country to Canada. You can whatever country you've set up your personalization for here. Note that in order to Personalize the same page differently for multiple countries, you will have to create multiple Personalization Experiences.
Go ahead and click the Add button.
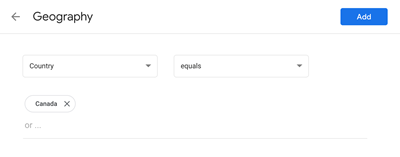
Make Site Changes
Now we need to actually modify how our page will look for users from the region we are targeting.
Click the Edit button to launch the Optimize editor. You should be using the Chrome browser for this step, and also will have to add the Google Optimize Chrome extension.
The next screen that appears will be a modified version of your website page. It looks complex, so let's walk through what we want to actually do here:
- Select the <div> elements that we want to hide
- Remove them
Click on the Select Elements action in the top left corner.
Since in my example I'm targeting Canada, I will select all the location elements that are NOT Canada, and remove them.
To do that, I entered the following Element Selector:
div[data-elem-type="region"]:not([data-region-target="Canada"])This selects all the <div> elements of data-elem-type="region" that are not of data-region-target="Canada".
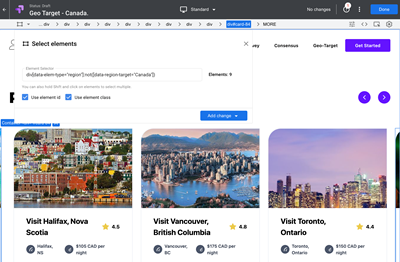
Now, click the Add change button and choose HTML.
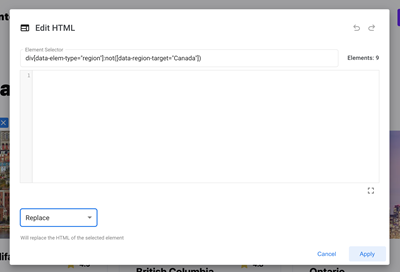
The only change we need to make on this screen is to choose Replace in the bottom left corner. Leave the text field blank.
This will effectively remove the elements that aren't meant for the Canada region from the screen.
Click Apply on this screen, and then Save and Done in the top right corner of the screen.
From there, our focus returns to the Optimize Experience edit screen.
The only thing we have to do now before we go live with this experience is set the event that will trigger this action on the page. In some sites, you can stick with the Page Load event, but with Next.js and other React-based sites, you need to switch this to a custom event. Do that by clicking on the Activation Event at the bottom of the screen.
The following dialogue should appear:
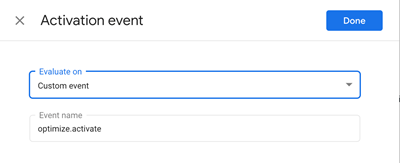
Choose Custom event and leave the event name as optimize.activate.
Step 4: Ready for Action
We're so close! Let's take a quick look at what the page looked like before the personalization. You can see items from both Canada and the United States.
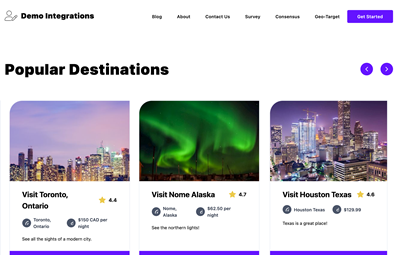
Now, from the Optimize screen, click on the Preview action and choose Web Preview. It will run the Personalization for us as if we were from the target region.
Here's what my content now looks like:
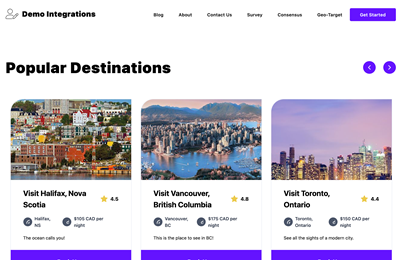
Success! Only the items tagged with the Canada region are shown.
Now we can click Start on our experience. It will run until you turn it off.
You can create more Personalization Experiences on the same page to target different regions by following the same steps.
What's really cool here is that your content editors can now add content that will be automatically geo-targeted based on the rules you've set up in Google Optimize.
As you want to enable personalization for more regions, you can add more items to your Region Target dropdown, just be sure to add Experiences for that target in Optimize as well.