June 2013 Release Highlights

The Agility June 2013 Release has a slew of new features that we've had in the works for some time:
- Shared Module Zones - allows users to configure modules on one page using a specific page template and have the configuration applied to ALL pages using that page template.
- Addition of Page Paths for Content Items in the Ready to Publish Report - provides greater visibility into content being published from the report.
- New Report: Configuration Tracking - tracks changes Agility users make to Settings in Agility.
- New Report: User Activity - tracks users that have logged into your Agility instance including login date and last activity date.
- Required Image Fields - when an image field is marked as required, users can no longer save a the content item without an image uploaded.
- Link Picker Supports Dynamic Pages - you can now select Dynamic Pages from anywhere that uses the Link Picker within your Agility instance.
Read on for more details.
Shared Module Zones
The addition of Shared Module Zones allows content editors to make changes to modules within a Module Zone on one page and have those same changes reflected on any other page within their site that uses the same Page Template. This makes it much easier to manage multiple pages using the same or similar content (as in a Header, Sidebar, or Footer) while only making the changes in one place.
How To: Create a new Page Template which uses a Shared Module Zone
Creating a Shared Module Zone can be done by creating a new Page Template from scratch or by creating a Page Template from an existing page structure (see How To: Change an existing Module Zone in a Page Template to a Shared Module Zone). In this tutorial, we are going to create a new Page Template which uses a Shared Module Zone.
- Navigate to Settings > Page Templates.
- Click New Page Template.
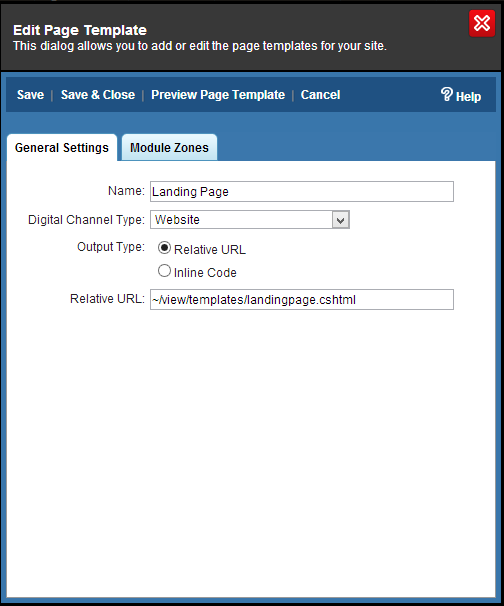
- Enter a Name for the Page Template.
- Select the Digital Channel that this Page Template will be available to.
- Select whether the Page Template will be created in Inline Code or a Relative URL to an .ASPX or .CSHTML page on your web server.
- Click Save.
- Next, click the Module Zones tab.
- Click New Module Zone.
- Enter a Display Name (the Reference Name will be completed for you).
- Select the checkbox labeled Shared Module Zone (Every page using this template will share the same modules within this Module Zone. Changing modules and content in this zone from any page will affect all pages using this template).
- Optionally select a list Default Module(s) to add to the Page Template. For Shared Module Zones this is less important, since you can modify the Shared Module Zone from within Pages.
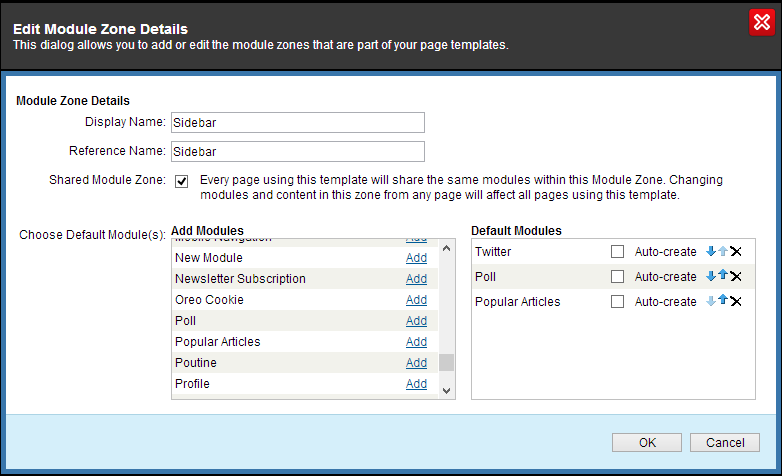
- Click OK.
- Repeat steps 8 -12 as necessary for the amount of Module Zones you require.
- In the Edit Page Template dialogue window, click Save & Close to save your changes.
- Your Page Template is now available to be used for any new or existing Page within Agility.
How To: Change an existing Module Zone in a Page Template to a Shared Module Zone
Because you may already be using the existing Page Template across multiple pages with different modules in your content zones, you will need to first create a new Page Template based off a current page of your choice. Then, you may change any other page's page templates to use this new Page Template which contains your new Shared Module Zone.
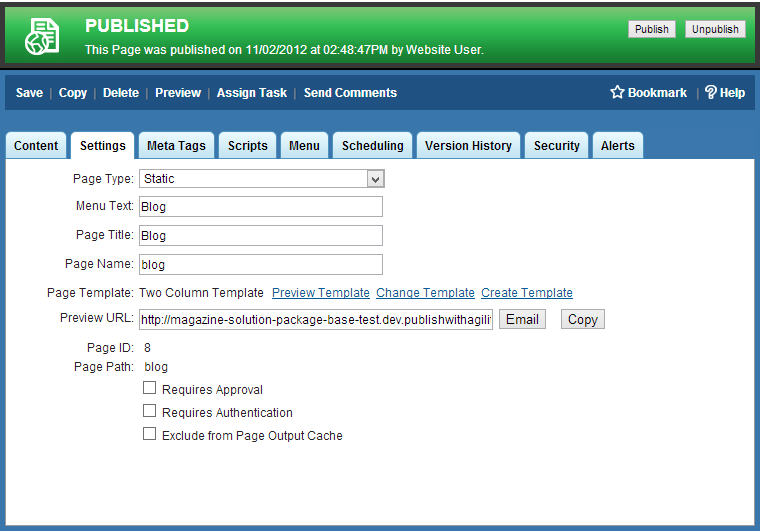
- Navigate to Pages and select a page you would like to create a Page Template from ? you will be making a copy of your current page?s structure and selecting which Module Zone you would like to be shared.
- Click on the Settings tab of your selected page and click the Create Template link located in the Page Template field.
- In the Create Page Template dialogue window, select a name for your new Page Template.
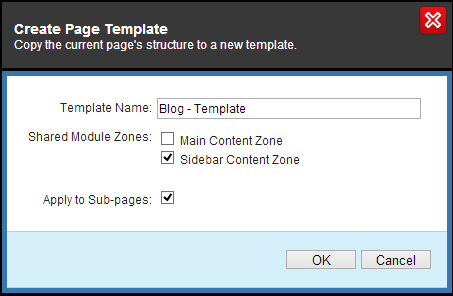
- Select which Module Zone(s) you would like to convert to a Shared Module Zone by checking the box adjacent to the appropriate Module Zone. In this example, we are defining the Sidebar Content Zone as a Shared Module Zone.
- Next, optionally check the Apply to Sub-pages property to force the new Page Template to be applied to all sub-pages. Note: this will replace all modules on those pages which belong to the Content Zone being marked as shared.
- Click OK to continue.
- The Content Zone(s) you selected as shared will now have the text (Shared) displayed adjacent to its label.

- Click Save and then click Preview to view your changes.
- If you are satisfied with your changes click Publish.
Updates to Reports
Ready to Publish Report Now Includes Page Paths for Content Items
The Ready to Publish report found in Reports > Ready to Publish now includes the page path from which the content item belongs to. This will help content editors better understand their content and what content need to be published using this report.

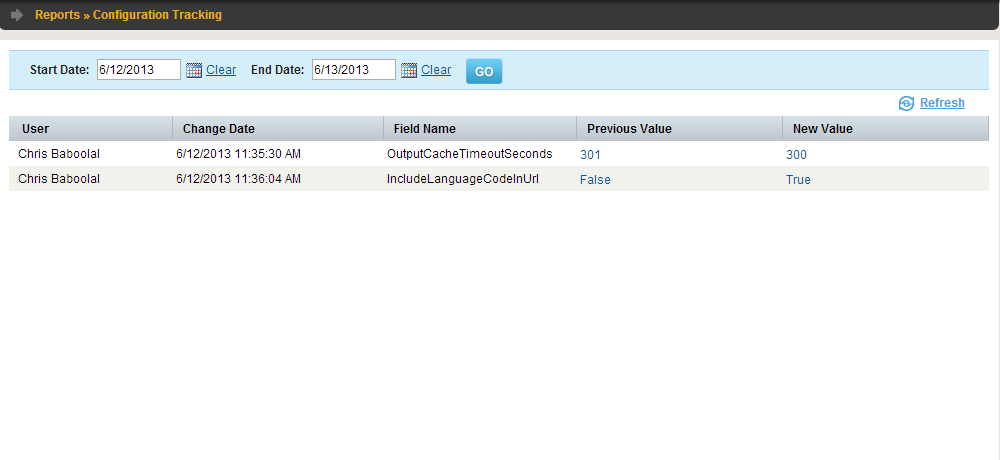
New Report: Configuration Tracking
The Configuration Tracking report found in Reports > Configuration Tracking can be used to track changes to Settings in Agility. This report shows the User who made the change, the Change Date, the Field Name, the Previous Value, and the New Value.
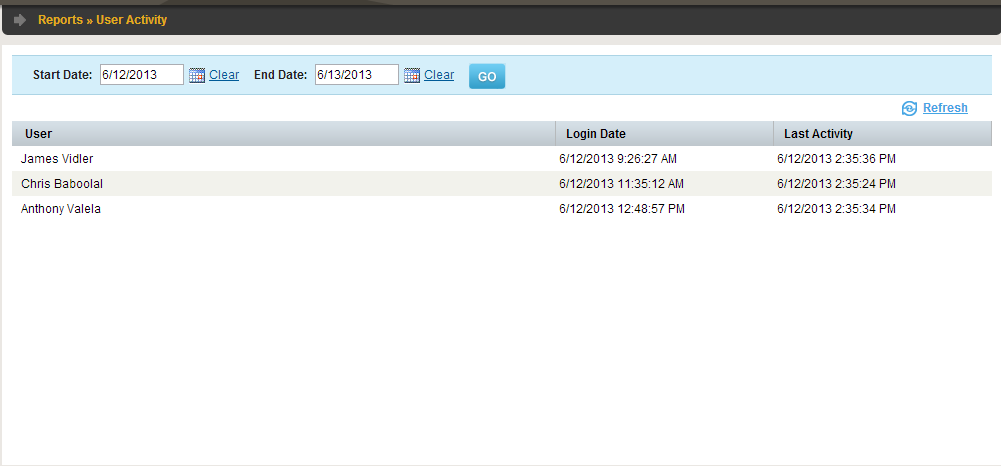
The User Activity report found in Reports > User Activity can be used to monitor Agility user activity. Using this report, you can view a list of Users which have logged into your Agility instance along with their Login Date and Last Activity.
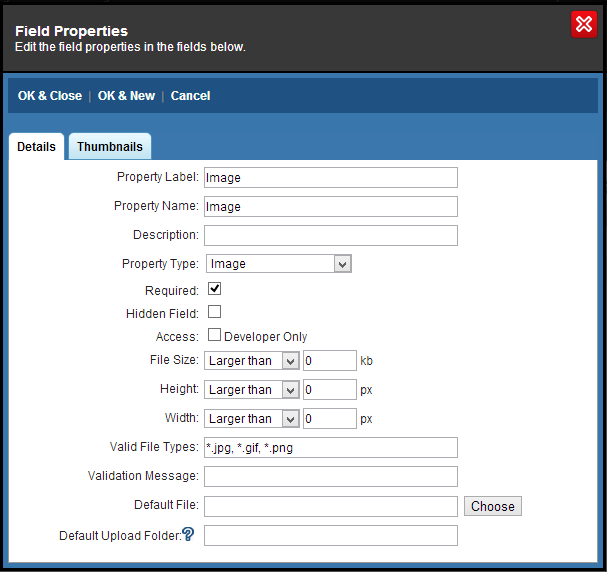
Required Image Fields
Agility now supports Required Image Fields. Previously, when using an Image property type, marking it as required would not enforce any policy on the input form as would be expected. This has now been addressed and will prevent content editors from saving a content item when an Image field which is marked as required, is empty.
Link Picker now supports Dynamic Page Items
Whether using a link picker from an input form or a rich text area, you can now select Dynamic Page Items.
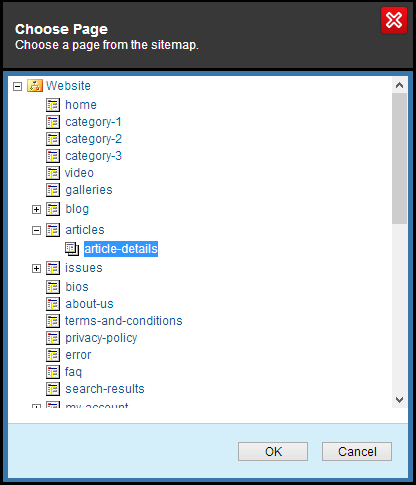
How To: Select a Dynamic Page Item URL from a Link Picker in Agility
- From an input form, click the Choose Page link OR from the Rich Text Editor click the Site Links icon.
- Within the Choose Page dialogue window, select and click the Dynamic Page node which links to your list of Dynamic Page Items you would like to select.
- This should launch a Choose Dynamic Page dialogue.
- Next, select the item you would like to link to.
- Click OK.
Note: The URL added may look different than your normal page path (ie. ~/articles/article-details?ContentID=123), however when this URL is loaded it will be redirected to the appropriate path.
Stay tuned for more coming soon!

About the Author
Agility CMS is Canada's original headless CMS platform. Since 2002, Agility has helped companies across Canada and around the world better manage their content. Marketers are free to create the content they want, when they want it. Developers are empowered to build what they want, how they want.
- Get a demo for a personalized walkthrough.
- Try for FREE and experience Agility CMS.
- Contact us with your questions.