Agility Academy: take courses and earn certifications. Learn at your own pace - it's free! Learn More
How the Next.js Commerce Starter Works
As mentioned in the previous article, Next Commerce is an all-in-one starter kit for high-performance e-commerce sites.
The Commerce Starter integrates out-of-the-box with multiple major ecommerce backends such as BigCommerce, Shopify, Swell, Saleor, and Vendure.
BigCommerce Integration
To use BigCommerce as an Ecommerce Integration, you'll need to sign up for a BigCommerce account, where you'll be able to create and set up a new BigCommerce Store to use as your Commerce Backend.
Setting Up Your Store
To set up your store, create a BigCommerce account. Once you create an account, you will be taken through an onboarding flow that will give you access to a Trial Plan Store.
Creating an API Account
Next, you'll want to create an API Account that will give us the keys we need to authenticate the Next.js Commerce site with BigCommerce.
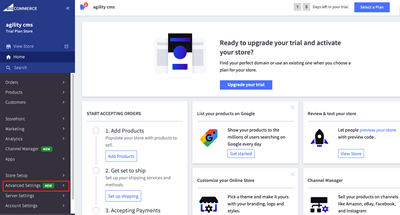
In your BigCommerce Admin Dashboard, click on Advanced Settings In the sidebar navigation, then click on API Accounts.

From here, create a V2/V3 API Token. Give your API Account a Name and select the API resources your Integration requires access to.
When your done, click Save and a .txt file will be downloaded automatically containing the credentials you'll need to Authenticate your Next.js Commerce site with BigCommerce.
Configuring the Commerce Starter for BigCommerce
If running the Next.js Commerce site locally, you'll want to open your Next.js Commerce project and edit the following Environment Variables in the .env.local.
If your Next.js Commerce site is deployed to Vercel, you'll want to edit the Environment Variables under the Settings of your deployed site.
COMMERCE_PROVIDER=bigcommerce

BIGCOMMERCE_STOREFRONT_API_URL=xxx
BIGCOMMERCE_STOREFRONT_API_TOKEN=xxx
BIGCOMMERCE_STORE_API_URL=xxx
BIGCOMMERCE_STORE_API_TOKEN=xxx
BIGCOMMERCE_STORE_API_CLIENT_ID=xxx
BIGCOMMERCE_CHANNEL_ID=xxx
You are now ready to start sourcing products from your BigCommerce store into your Next.js Commerce site.
Shopify Integration
To use Shopify as an Ecommerce Integration, you'll need a Shopify Partners account, where you'll be able to create and set up a new Shopify Store to use as your Commerce Backend.
Setting Up Your Store
Once you're logged into your Shopify Partners account, add a store.

Select the Development Store Type, and fill out the rest of the information with your own credentials. When you're done, click Save.

Creating a Private App
Next, you'll want to create a Private App that will give us the keys we need to authenticate the Next.js Commerce site with Shopify.
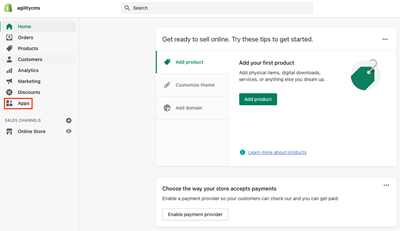
In the left navigation, click on Apps.

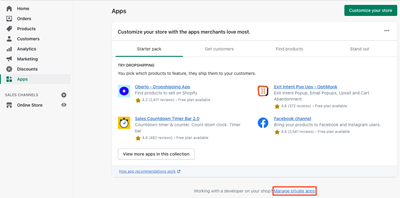
Create a new App by clicking on Manage Private Apps.

Fill out your App details, and allow the app to access your storefront data using the Storefront API.
Once you click save, you should now have the credentials you need to authenticate your Shopify Store with Next.js Commerce.
Configuring the Commerce Starter for Shopify
If running the Next.js Commerce site locally, you'll want to open your Next.js Commerce project and edit the following Environment Variables in the .env.local.
If your Next.js Commerce site is deployed to Vercel, you'll want to edit the Environment Variables under the Settings of your deployed site.
COMMERCE_PROVIDER=shopify
NEXT_PUBLIC_SHOPIFY_STORE_DOMAIN=agilitycms.myshopify.com
NEXT_PUBLIC_SHOPIFY_STOREFRONT_ACCESS_TOKEN=xxx
You are now ready to start sourcing products from your Shopify store into your Next.js Commerce site.