
 After many failed attempts at trying to turn an Excel spreadsheet into an editorial calendar, I've given up on turning those little cells into a manageable content organizer.
A spreadsheet requires too much manual maintenance and is too clunky to work with for more than a week or two of blog posts. So, I've turned to Google Calendar to manage my blog topics and scheduling efforts to much success.
Google Calendar is a great platform to host your editorial calendar. It's easy-to-use, flexible and moving things around is simple and seamless. It's also easily shareable, making it possible for multiple content contributors to collaborate on ideas and gain visibility into what is in production/go-live dates.
The best part is that it's free!
How to Set Up Your Google "Editorial" Calendar
Step 1: Create Your Google Calendar
Assuming you already have a Google Account (if not, it's time to create one), head over to google.com/calendar and click on the dropdown arrow beside "My calendars" in the left sidebar and select "Create a new calendar".
Next, fill in the fields on the proceeding screen to your liking.
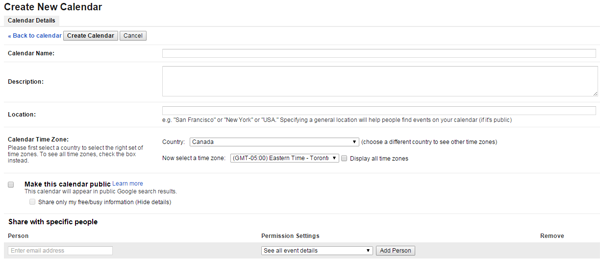
Tip: Leave the sharing options blank for now. That's covered in Step 4.
Once the fields are filled in, click "Create Calendar", and you'll be redirected to your new calendar.
Step 2: Fill In Recurring Publishing Times
It's time to start filling in your calendar. Start will your regular posting schedule. If you currently post a blog at 11 a.m. every Tuesday, fill that in as a recurring event.
Note, you don't need to fill in exactly what the blog post will be at this point, just enter a placeholder to remind yourself that content needs to go up at that time every Tuesday, or whatever your recurring posting times may be.
To create a recurring event, click on the day and time where you want your placeholder to go and enter a temporary title like "Topic TBD". After that, within the event, check off the "Repeat" checkbox in the top left underneath the date/time control.
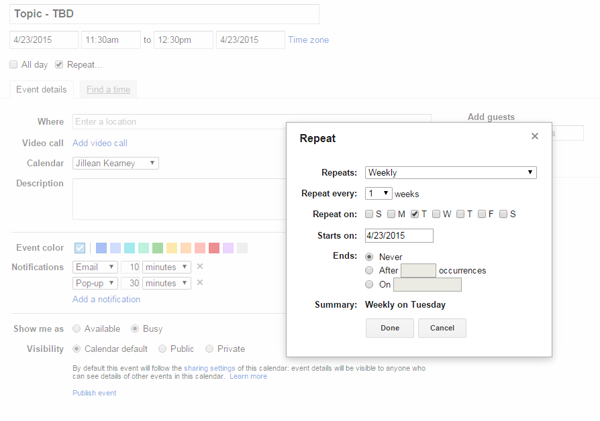
You'll be presented with a pop-up where you can set how often this event should occur. Once you've set up your desired recurring time, hit "Done", then "Save".
Step 3: Fill in Your Topics
Now, you can go through and replace all of your "Topic TBD" events with actual titles by editing each one.
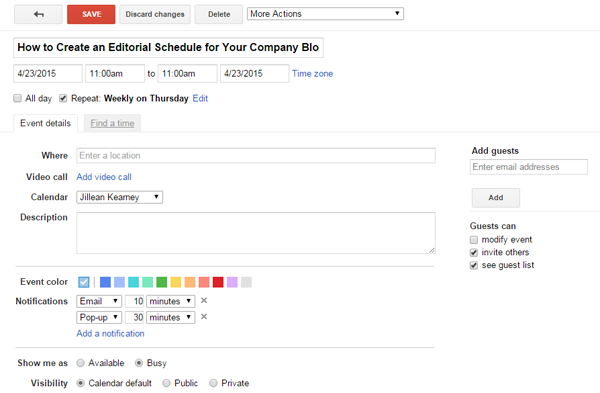
You can also start assigning each topic to other members of your content team. Within a specific event, invite the contributor to view the calendar by entering their email address into the "Add guests" box.
If you like, you can also add details about each topic/post and what's expected in the description box.
Step 4: Invite Your Team
If there are contributors that you have yet to assign work to within your Google Calendar, invite them now. You can also share your calendar with other departments and anyone else that needs visibility into your posting schedule.
To share, click on "Share this Calendar" which appears when you click on the dropdown arrow beside the calendar's name within the left side bar. From here, add in the names/emails of all invitees. You can also set permission levels to allow limited/no editing abilities.